為靜態網站快速加入 Disqus 留言功能
在搞這個部落格的時候,因為想要有互動功能,cloudflare pages 沒提供後端,只能找第三方服務來用,原本嘗試用最常見的「Facebook Comments」,但是一直沒辦法成功,後來決定轉向更輕量、干擾更少留言系統 —— Disqus。以下紀錄了實作過程與設定指南。
為什麼選擇 Disqus?
- 介面純粹:專為靜態部落格文章而生,可以選擇用社群帳號(Google、X / Twitter、Facebook)註冊登入,然後留言。
- 開發者友善:不需要嚴格的 APP 驗證機制,把申請到的 ID 塞進腳本裡就能立即生效。
實作步驟
1. 去官網註冊並取得 Shortname
首先前往 Disqus 註冊一組帳號。 註冊完畢後選擇「I want to install Disqus on my site」。
在網站基本設定中,最關鍵的是 Website Name,這會決定你的專屬唯一代號(Shortname)。例如我輸入的是 scalesolutions,那我在這個部落格的 disqus 網址就會是 scalesolutions.disqus.com。
2. 在文章版面中加入 Disqus 區塊
在 Astro 中,我們找到文章版面的共用版型(我的是 src/layouts/BlogPost.astro),然後在原本的 <slot /> 內文下方,插入 id="disqus_thread" 的容器以及官方提供的載入腳本:
<div class="comments-section" style="width: 760px; max-width: calc(100% - 2em); margin: 4rem auto 0; padding-top: 2rem; border-top: 1px solid var(--border); min-height: 200px;">
    <h3 style="margin-bottom: 1.5rem; text-align: center;">留言區</h3>
    <div id="disqus_thread"></div>
</div>

<!-- 必須使用 is:inline 防止 Astro 把腳本打包拔除 -->
<script is:inline>
    // Disqus 規定要丟給他當前頁面的 URL 與辨識碼 Identifier
    var disqus_config = function () {
        this.page.url = window.location.href;
        this.page.identifier = window.location.pathname;
    };

    (function() {
        // 這裡把 scalesolutions 換成你自己申請的 Shortname
        var shortname = 'scalesolutions';

        var d = document, s = d.createElement('script');
        s.src = 'https://' + shortname + '.disqus.com/embed.js';
        s.setAttribute('data-timestamp', +new Date());
        (d.head || d.body).appendChild(s);
    })();
</script>
<noscript>請啟用 JavaScript 以瀏覽<a href="https://disqus.com/?ref_noscript">留言區塊。</a></noscript>
注意!Astro 的特殊設定:原本 Disqus 官方提供的程式碼是純 JS,但在 Astro 的架構中,
<script>標籤預設會被抽離打包至<head>或做模組化處理。如果沒有在<script>後面明確加上is:inline指令,Disqus 會完全無法啟動!
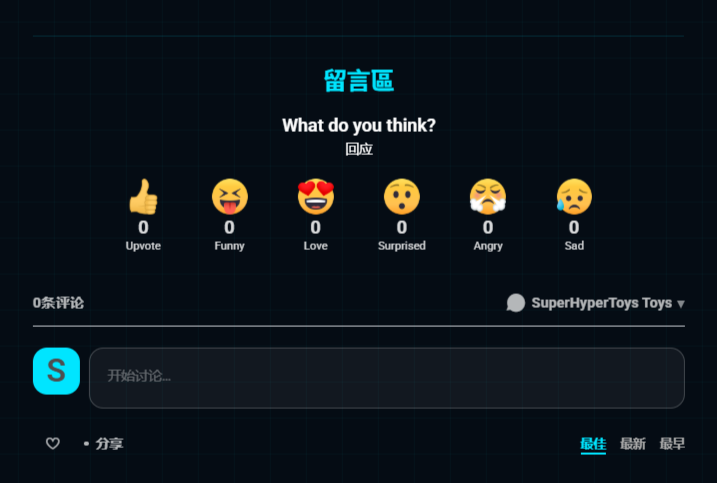
3. 發布並測試
設定好 shortname 後,將網站打包並推送到正式環境(Cloudflare / GitHub Pages)。這時如果用無痕模式開啟文章,就能看見在文章底部成功長出版面乾淨、不再頻頻出問題的 Disqus 留言區了。
小結
雖然過去大家都偏好選用社群平台的開放留言板,但隨著隱私權高漲與瀏覽器安全機制的改變,許多直接掛鉤社群平台的套件都越來越不穩定。使用原生的第三方部落格留言板如 Disqus,不僅不用搞後端,租空間放程式,還很簡單就能完成,減少了除錯的時間,一舉多得啊!
留言區